PIXELS FOR THE PIXEL GOD
As a break from my other open source projects, have decided to start spending my Art~Hack evenings on my next (3rd?) generation of modular LED pixels that beat to music.
First generation§
First generation: beatpixels
- uses WS2801 pixels (pre-soldered to inject power every 2 or 4 meters?)
- uses an Arduino Uno micro-controller to control the pixels using a custom message protocol over serial
- uses an laptop running Pure Data to send messages to the Arduino
- learning: it’s difficult to be expressive in the C language
Second generation§
The second (and maybe second-second) generation: pixelbeat / mood-light.
- used a BeagleBone Black / Green computer, later just used my laptop with a usb-to-ftdi-to-spi controller
- used WS2012 / APA102C pixels, manually split strips to inject power every 2 meters
- friend Gordon (Fre3formd) made a custom 3d-printed enclosure for power injection connections to reduce failure during setup and teardown
- created and used module ecosystems around ndarray: ndpixels, ndsamples
- eventually learned to make modules be simple functions, like pixels-apa102, in order to better collaborate with others like Matt
- experimented with BeagleBone booting directly to an electron app as the window manager: boot-to-electron
- learnings
- computer operating systems are fragile
- JavaScript garbage collection is bad for real-time
- BeagleBones don’t have enough juice to power a smooth audio-reactive visual set
- manually injecting power into strips takes too much time to setup
gigs:
- inky waves (using Matt’s audio-splatter)
- campjs (using Matt’s Loop Drop)
- … a few others that I’m too lazy to find.
Third generation ???§
Third generation: pj (pixel jockey) !
- use WiFi-enabled micro-controller (ESP32) to control the pixels using Open Pixel Control
- create a desktop and mobile app to send messages to the micro-controller over WiFi
- either have 4 meter strips, or find a way to get 4 meter strips pre-soldered for injection. use either separate AC->DC units per injection, or find a way to get clean connectors to a larger unit.
- if at a gig and you want to minimize latency, have an option to connect over Ethernet
- have clean enclosures and connectors, or don’t even bother wasting time
It begins§
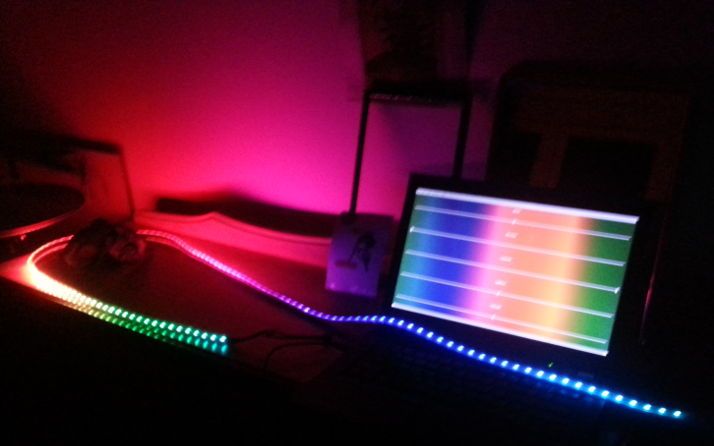
As always, it begins with a scrolling rainbow 🌈
(Using an electron app to simulate the hardware in JavaScript before I commit to anything.)
- published pull-opc@1 to send and receive Open Pixel Control messages using pull streams
- published pixels-opc@4 to send ndpixels
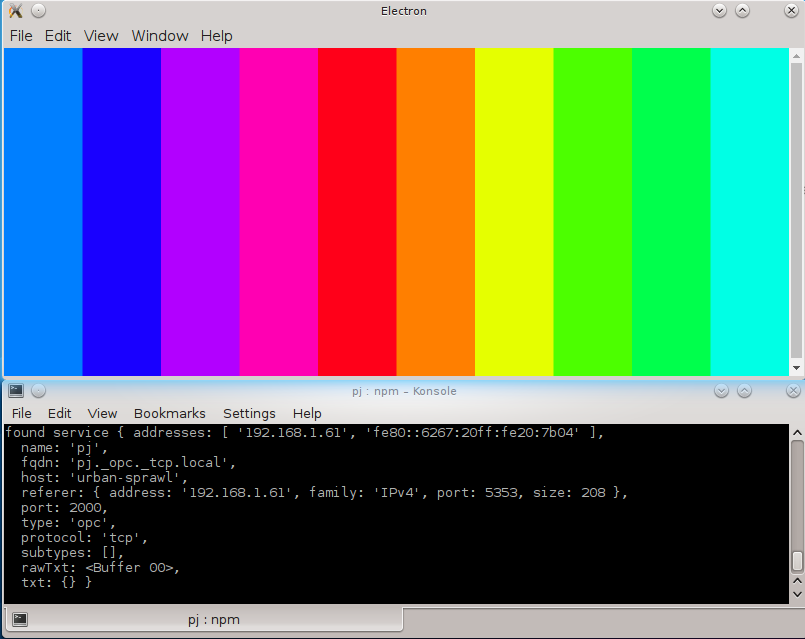
- scaffolded a follower simulator using electron
- follower broadcasts up over mdns
- scaffold a leader that sends rainbow pixels to any up followers
LED power requirements and connectors§
From Pololu’s page on the APA102C LEDS:
Each RGB LED draws approximately 50 mA when it is set to full brightness and powered at 5 V. This means that for every 30 LEDs you turn on, your LED strip could be drawing as much as 1.5 A.
Multiple LED strips can be chained together by connecting input connectors to output connectors. When strips are chained this way, they can be controlled and powered as one continuous strip. Please note, however, that as chains get longer, the ends will get dimmer and redder due to the voltage drop across the strip
We recommend chains of LEDs powered from a single supply not exceed 180 total RGB LEDs. It is fine to make longer chains with connected data lines, but you should power each 180-LED section separately. If you are powering each section from a different power supply, you should cut the power wires between the sections so you do not short the output of two different power supplies together.
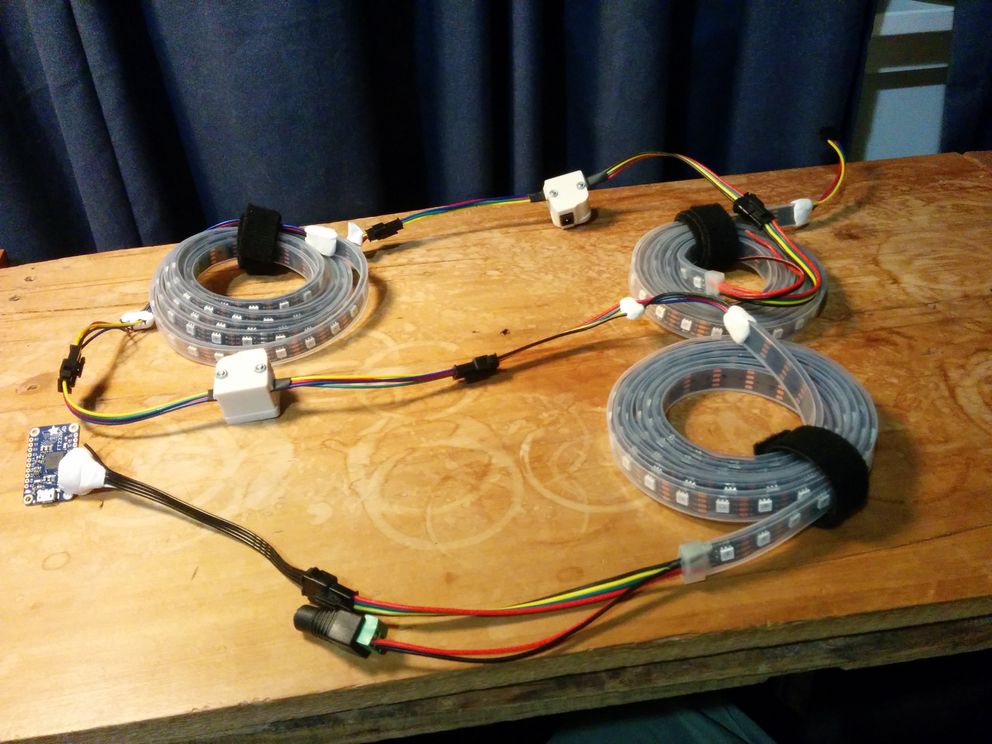
I’m using 60-LED per-meter strips, and due to my own calculations decided to split the strips every 2 meters. Now I’d rather do 3 meters (as recommended above) or 4 meters (since I almost never display at full brightness anyways).
To split the strips, I cut the strips with a wire cutter and soldered on 4-pin JST connectors at each end, using Sugru to re-create a protective cover over the silicon sheath on the LEDs to the wires.
Then I used the SEEED AllPixel Power Tap Kit to connect in between the strips and re-inject the power using a large-ish 5V power supply and some custom soldered wires.
But this setup would break anytime I transported the LEDs to and from Art~Hack or a gig. Specifically the wires connecting to the Power Tap between the LED strips.
So I received the support from my friend Gordon of Fre3formD to design and 3d print a custom enclosure for the Power Tap so that the pressure on the wires wouldn’t cause them to break.
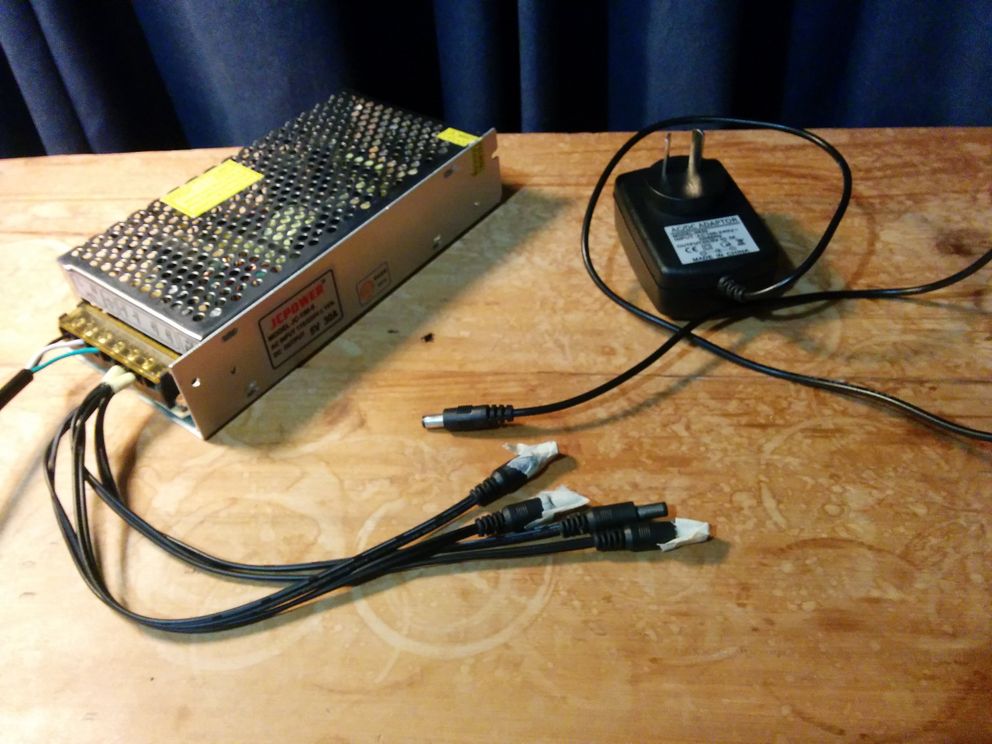
Since then I’ve also started using small 5V power supplies per injection, since it’s much easier to run normal AC power extensions and it’s much more flexible to accommodate any venue. But I also haven’t run more than 12 meters of LED strips at a time yet, nor any permanent installations using this recent setup.
A new play with portable rainbows§
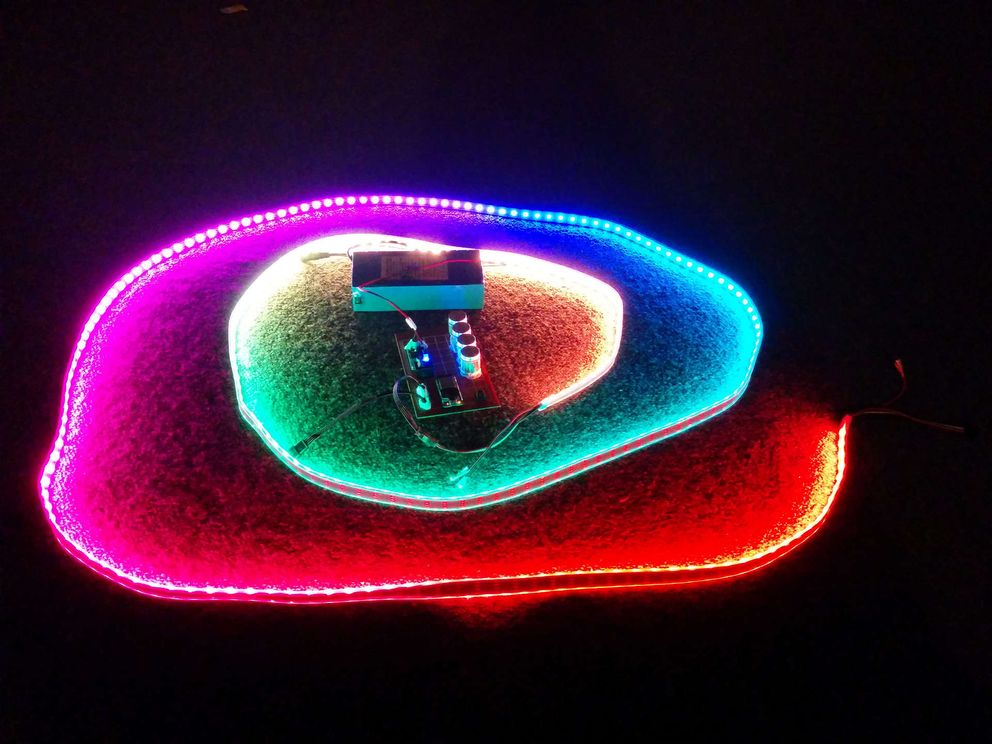
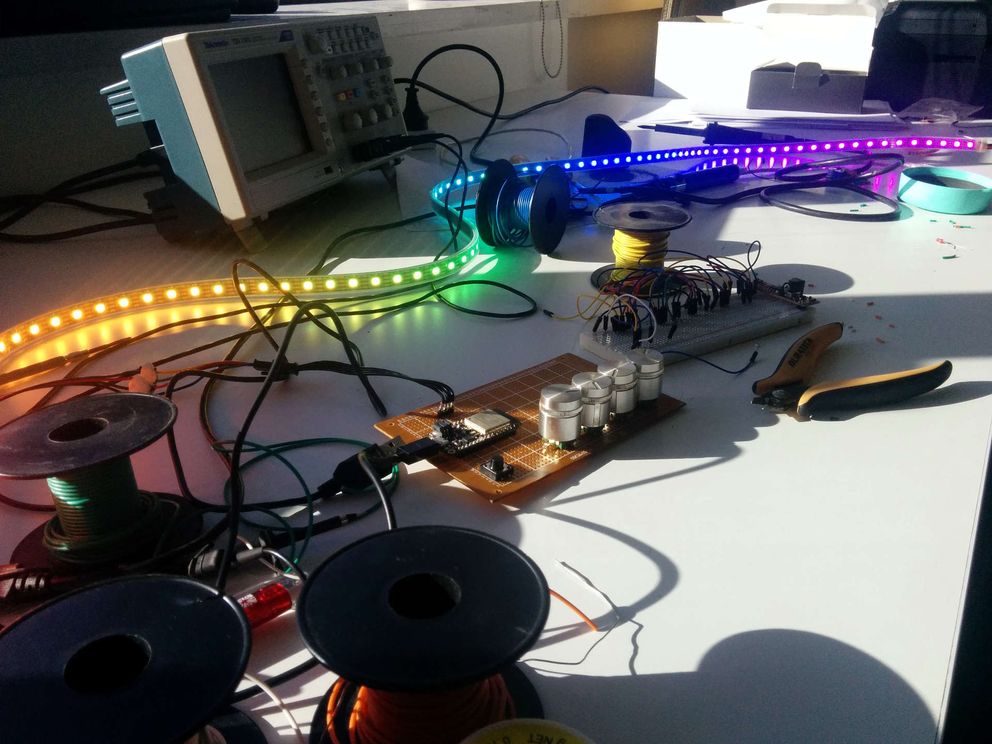
Have a working prototype using the esp32, some rotary encoders, a button, and an apa102 led strip:
https://github.com/ahdinosaur/aburndance
You click the button to cycle through “modes” (currently have rainbow mode, star field mode, and convergence mode). Each mode can use params from the first 3 rotary encoders, 4th rotary encoder is always used for global brightness.
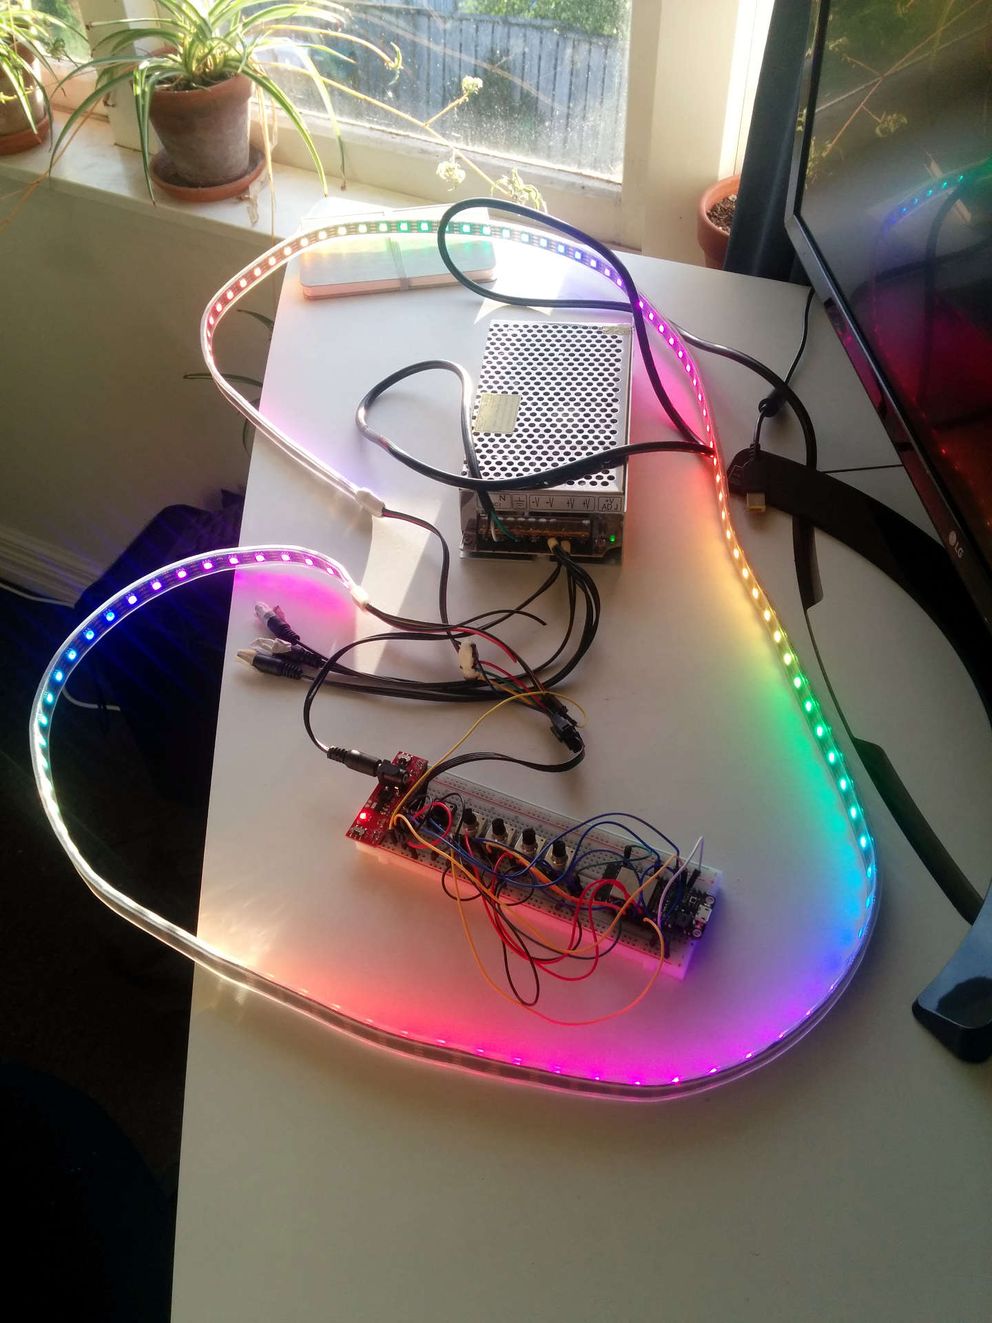
Today ported my setup from a breadboard to a protoboard, plus found some fancy knobs lying around the space!
🎈
Off-grid new years’§
Portable rainbows and me for off-grid new years’ 🎊